
I started building this website in 2019 as my first web development project, and it's come a long way since then. V1 was ugly and pretty bare-bones, and V2 was still kind of ugly but at least it had dark mode. V3 is, dare I say, pretty slick. Here's how the landing page has evolved over the years.
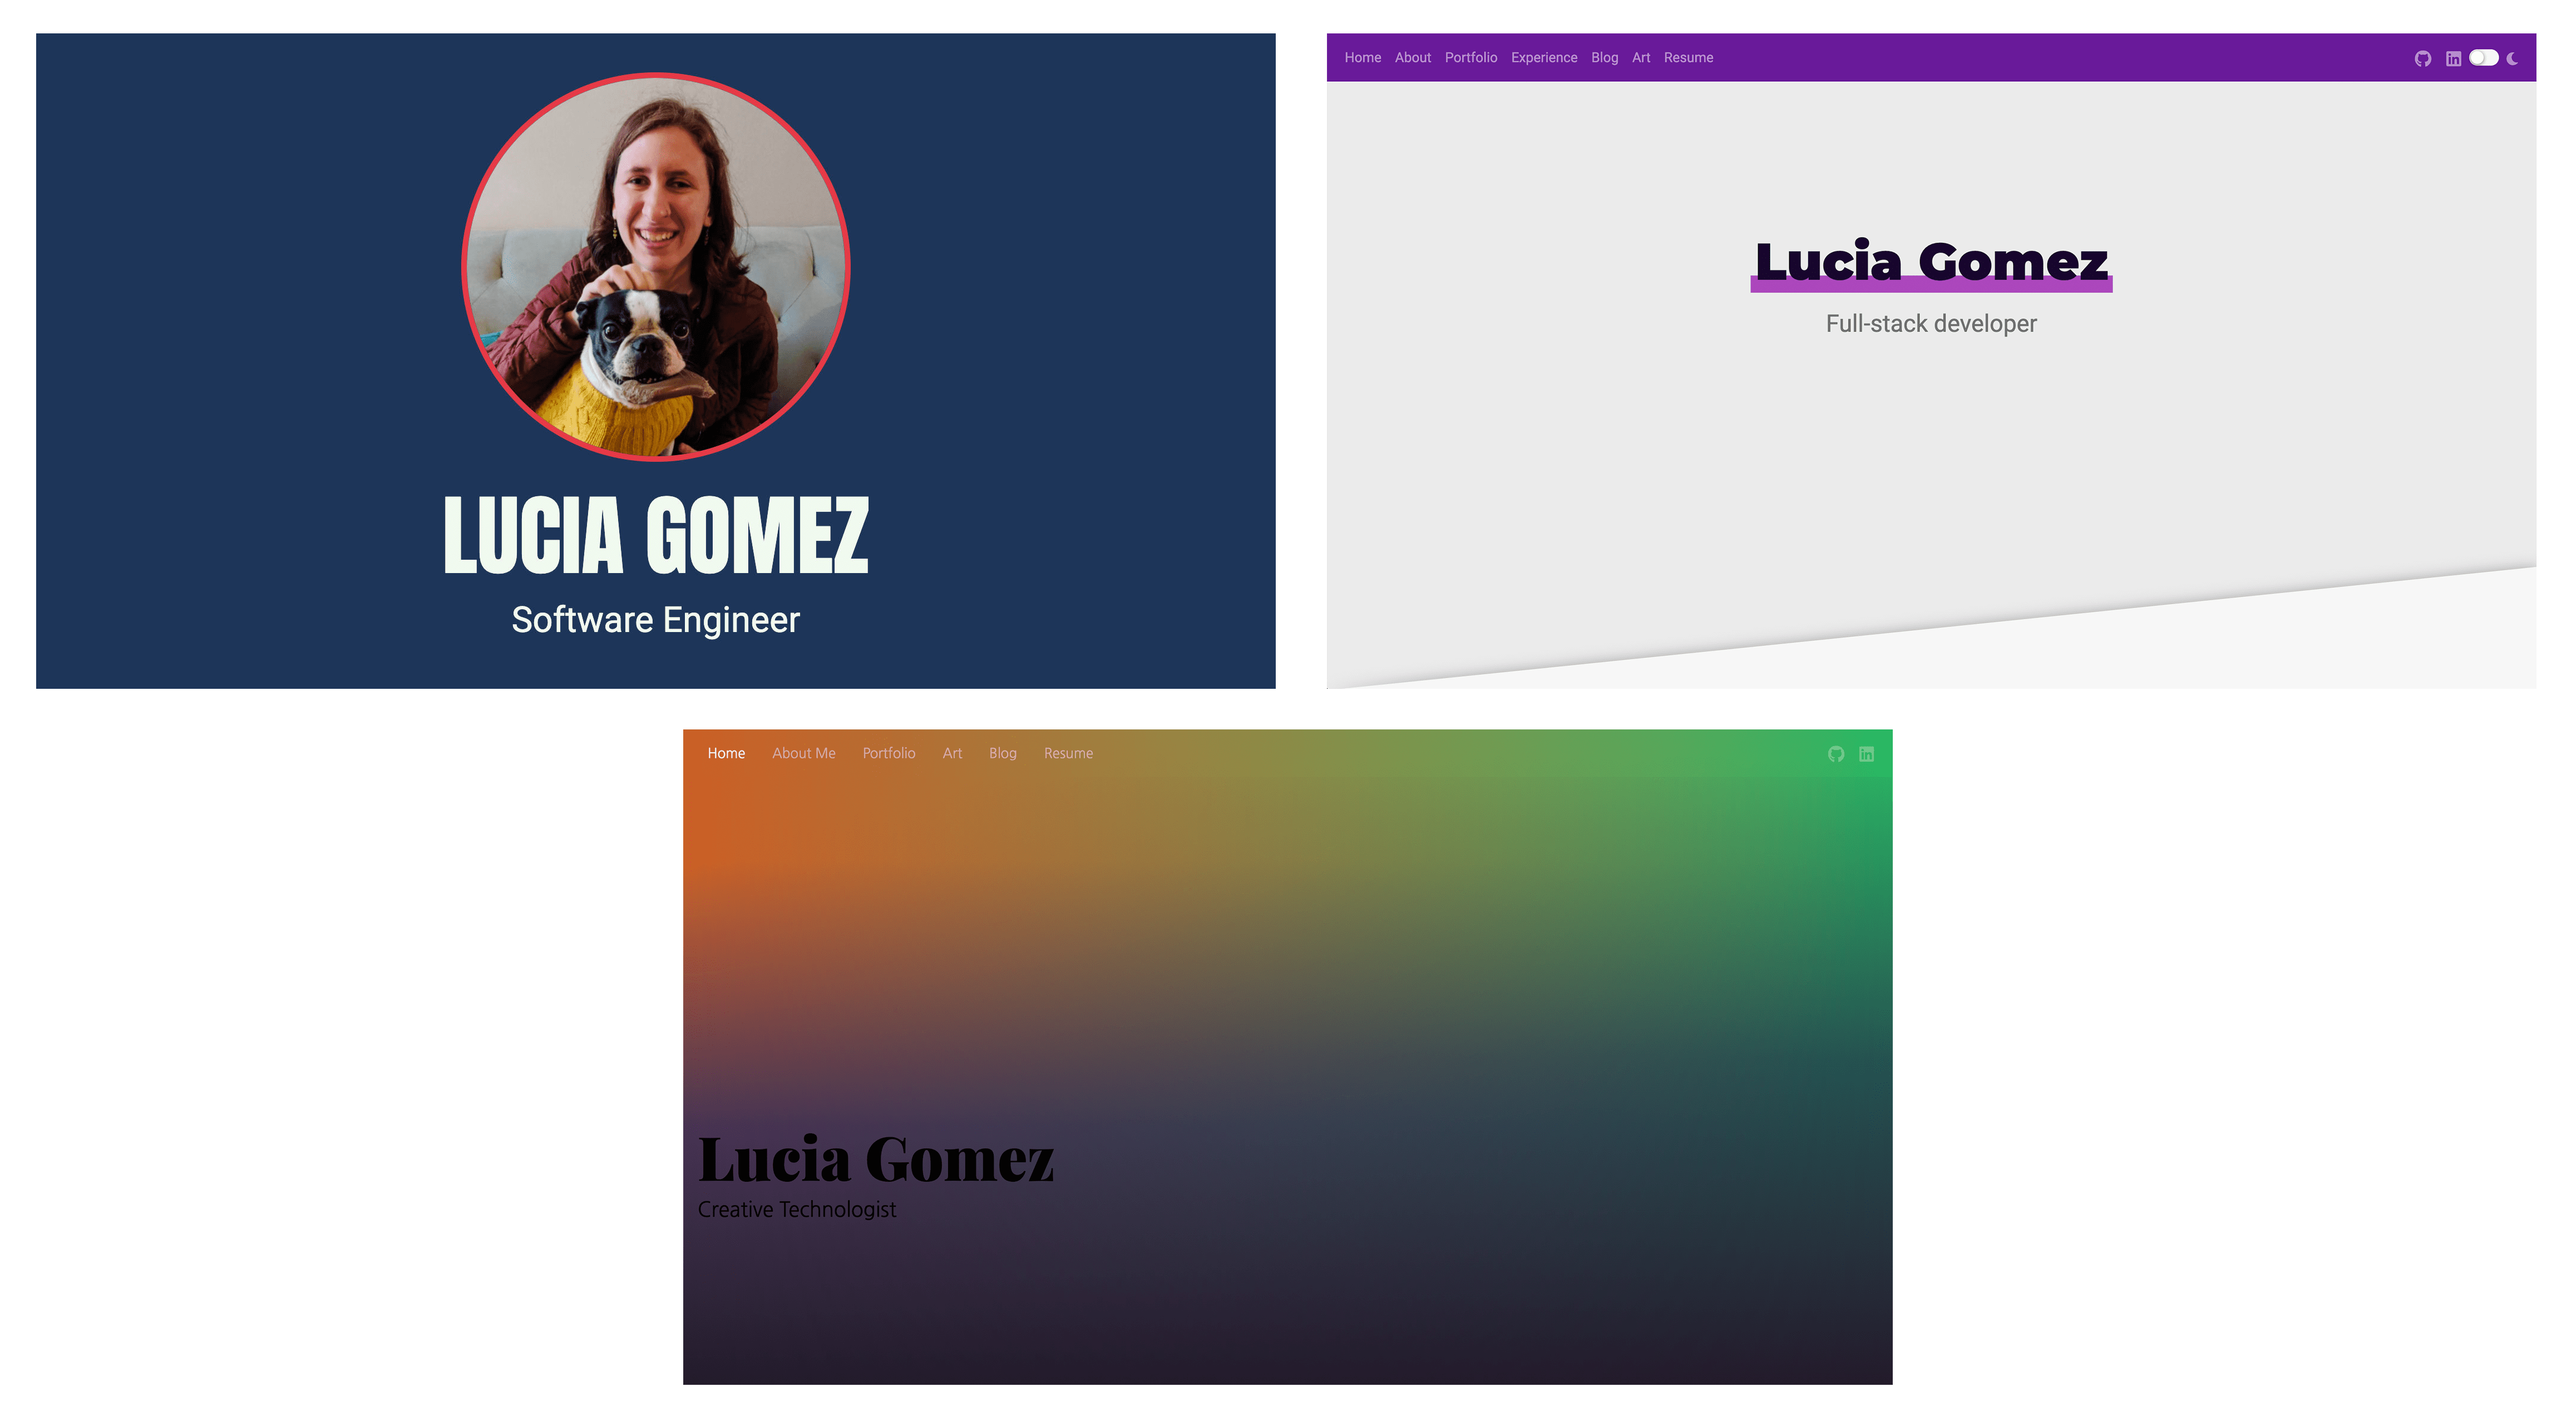 Left: V1, right: V2, center: V3
I've also updated my title from Software Engineer to Full Stack Developer to Creative Technologist, which is my way of saying that I've learned to build cooler stuff.
New Features
I've made some big changes to this website in V3. Some of the more important ones:
New color scheme! I used a multicolored CSS gradient that fades into a darker background color as the page scrolls. This may have been because I couldn't decide on a single color for a theme
Animations. Some elements have a fade-in animation when the page loads or when you scroll to them. It's always impressed me when webpages do this, and I learned how easy it is to achieve with
react-intersection-observerandAnimate.cssBlog security. While working on my server I realized that when I built this blog I accidentally published my private database key to GitHub. Meaning that anyone could have gone snooping for that key and taken over my blog. Oops. That private key has been refreshed and now I've learned the magic of environment variables so that will never happen again.
Markdown. I converted my blog text editor to use Markdown instead of a what-you-see-is-what-you-get editor. Now it's so much easier to format things and write pretty syntax-highlighted code blocks like this
const markdownIsAwesome = true
const websiteVersion = 3.0
CDN. I'm using
Imagekit.ioas a CDN (content delivery network) to host my static assets, i.e. images. This has a few benefits- Image files can be large, and now they don't take up space when deploying this site
- I can update images without writing or deploying code
Load time. This website's bundle size is now 3x as small and loads roughly 3x as fast as V2. That's mostly due to offloading images to the CDN and switching to Markdown. The code syntax highlighter I was using was contributing to ~50% of my bundle size, and I get that feature for free with Markdown!
Mailing list. Maybe that's why you're reading this! I added a table to my database to store a list of subscribers, and used
Mailjetto send confirmation emails and newsletters. Using Mailjet's API was an uphill battle, to say the least. I don't think their customer support team is very happy with me. I added a new admin panel to this website that lets me draft emails and send tests to myself before gracing everyone's inboxes.
Lessons Learned
I always learn new tips and tricks when I dive into a project. Here's some of my biggest takeaways so that I don't forget.
CSS stacking contexts. I had to read up on this when working with the CSS property
mix-blend-mode. That property lets you mix images with the page background in cool ways, like the image header at the top of this page. Apparently doing this creates a new stacking context, which means it's sort of a separate layer on the page. Changing an item's opacity or transforming/animating it also creates a new stacking context. Weird things happen when you have nested stacking contexts, which messed up my image blend modes. I didn't find a way around this so I stopped animating things that usemix-blend-mode. If you refresh this page, the image at the top doesn't gracefully fade in for this reason. Link for reference.IntersectionObserver is magic. This API tells you when items are visible on a page. That might sound simple but I spent a few days banging my head against a wall trying to implement that math and use it to animate a scrolling list. Thankfully a friend pointed me towards
react-intersection-observerand that made my life way easier. Thanks, Ben!API organization is important. There were a lot of places in my code where I was calling to my API, or code that runs on my server. I organized those API calls into a single file (here, if you're curious) to keep track of everything. This helped me notice some inconsistencies in how I was passing data to my server.
Router wrapper. I use
react-routerto create multiple pages on this website. By defining my navigation bar outside of this router and wrapping it around my page definitions, I can prevent the nav bar from reloading whenever you go to a new page.URI encoding. When you subscribe or unsubscribe from my mailing list, I need to send your email address to my server to handle the request. It's good practice to not send raw user data in network requests, so I encrypt them before sending. This is also good for security and spam prevention, because without this step anyone could go to https://lucia-gomez.dev/confirmation/jane.doe@gmail.com and sign Jane Doe up for my mailing list without her permission. If you visit that link you'll get an error that that email couldn't be subscribed, because the server only knows how to handle encrypted email addresses, not raw ones. Sending an encrypted email address in my network request meant I also had to encode it as a URI component so it would still be a valid URL. I had seen % signs in links before but now I know that's where they come from.
Debounce vs throttle. Both are used to reduce the frequency of events that trigger repeatedly in a short span of time.
lodashis a helpful library for using both of these functions, and here's how I remember when to use them- Throttle: Fire an action every
xseconds while the event is still happening. Ex: my blog editor autosaves every 10s as I'm typing. Without throttling it would save on every keystroke or save every 10s regardless of whether I typed anything - Debounce: Fire an action
xseconds after the last time the event was triggered. Ex: my blog search bar updates the results 200ms after typing pauses or stops. Without debouncing it would update on every keystroke, which is jarring
- Throttle: Fire an action every
Checking bundle size. I learned how to use
source-map-explorerto inspect my website's bundle size. I'm using a lot of third-party libraries and this lets me see how much space they take up. There's a nice visualization that shows how each package contributes to the total bundle size