I've tried to learn 3D modeling with Blender a few times, but I've always gotten frustrated with navigating the UI and kept giving up. I'm determined not to do that this time! I'm following an introductory course through GameDev.tv and it really covers the basics, including how to efficiently navigate the viewport to approach your 3D models from all angles. In following along with the lessons I feel like I'm learning the thought process behind 3D modeling rather than just blindly pressing buttons, as I've felt with most tutorials (I'm looking at you, Blender Donut).
 Raise your hand if you've ever been personally victimized by the Blender Donut tutorial series
Lighthouse Project
My first mini-project through the GameDev course was creating a scene with a lighthouse on an island. I got the hang of a few things in Blender that I've struggled with in the past:
- Shading modes: wireframe/solid/material/render. These control what you see in the viewport. Solid mode, for example, only shows the mesh geometry and not the material or lighting. Render mode shows exactly what you'll get when you render a scene, which produces the images I've included below
- Hotkeys: So. Many. Hotkeys. Everything is a keyboard shortcut which means a steep learning curve. I've gotten used to the hotkeys for translating and scaling on a single axis
- Beveling: on edges vs. on vertices, and how to add more segments/subdivisions to get a more gradual bevel. This is a pretty important tool, because real physical objects rarely have perfectly sharp edges
- Basic materials: how to create colored materials and assign them to faces on a mesh. I was confusing this with texture painting, which is more complicated and is essentially wrapping a 2D painted skin around a 3D mesh. Materials, on the other hand, tell the render engine how the object interacts with light and are easy to create and reuse for multiple objects
 Lighthouse scene modeled and rendered in Blender
Dungeon Project
The next project was creating modular components (crates, columns, walls) to use for a dungeon scene. By making a few variations of the same basic components, you can copy them a bunch of times and still build an interesting scene quickly and with few resources. More skills I picked up:
- Mirror modifier: the stone columns I built have vertical symmetry. The mirror modifier applies to a mesh and will reflect whatever you build across an axis, so it's easy to keep the model exactly symmetrical
- Chips and cracks: a big part of this project was giving the assets a rough look and feel. I got a lot of practice using the bevel tool to create chips and cracks in the wood crates and stone columns. I've been playing a lot of the newly released Legend of Zelda: Tears of the Kingdom and saw the same types of modifications there!
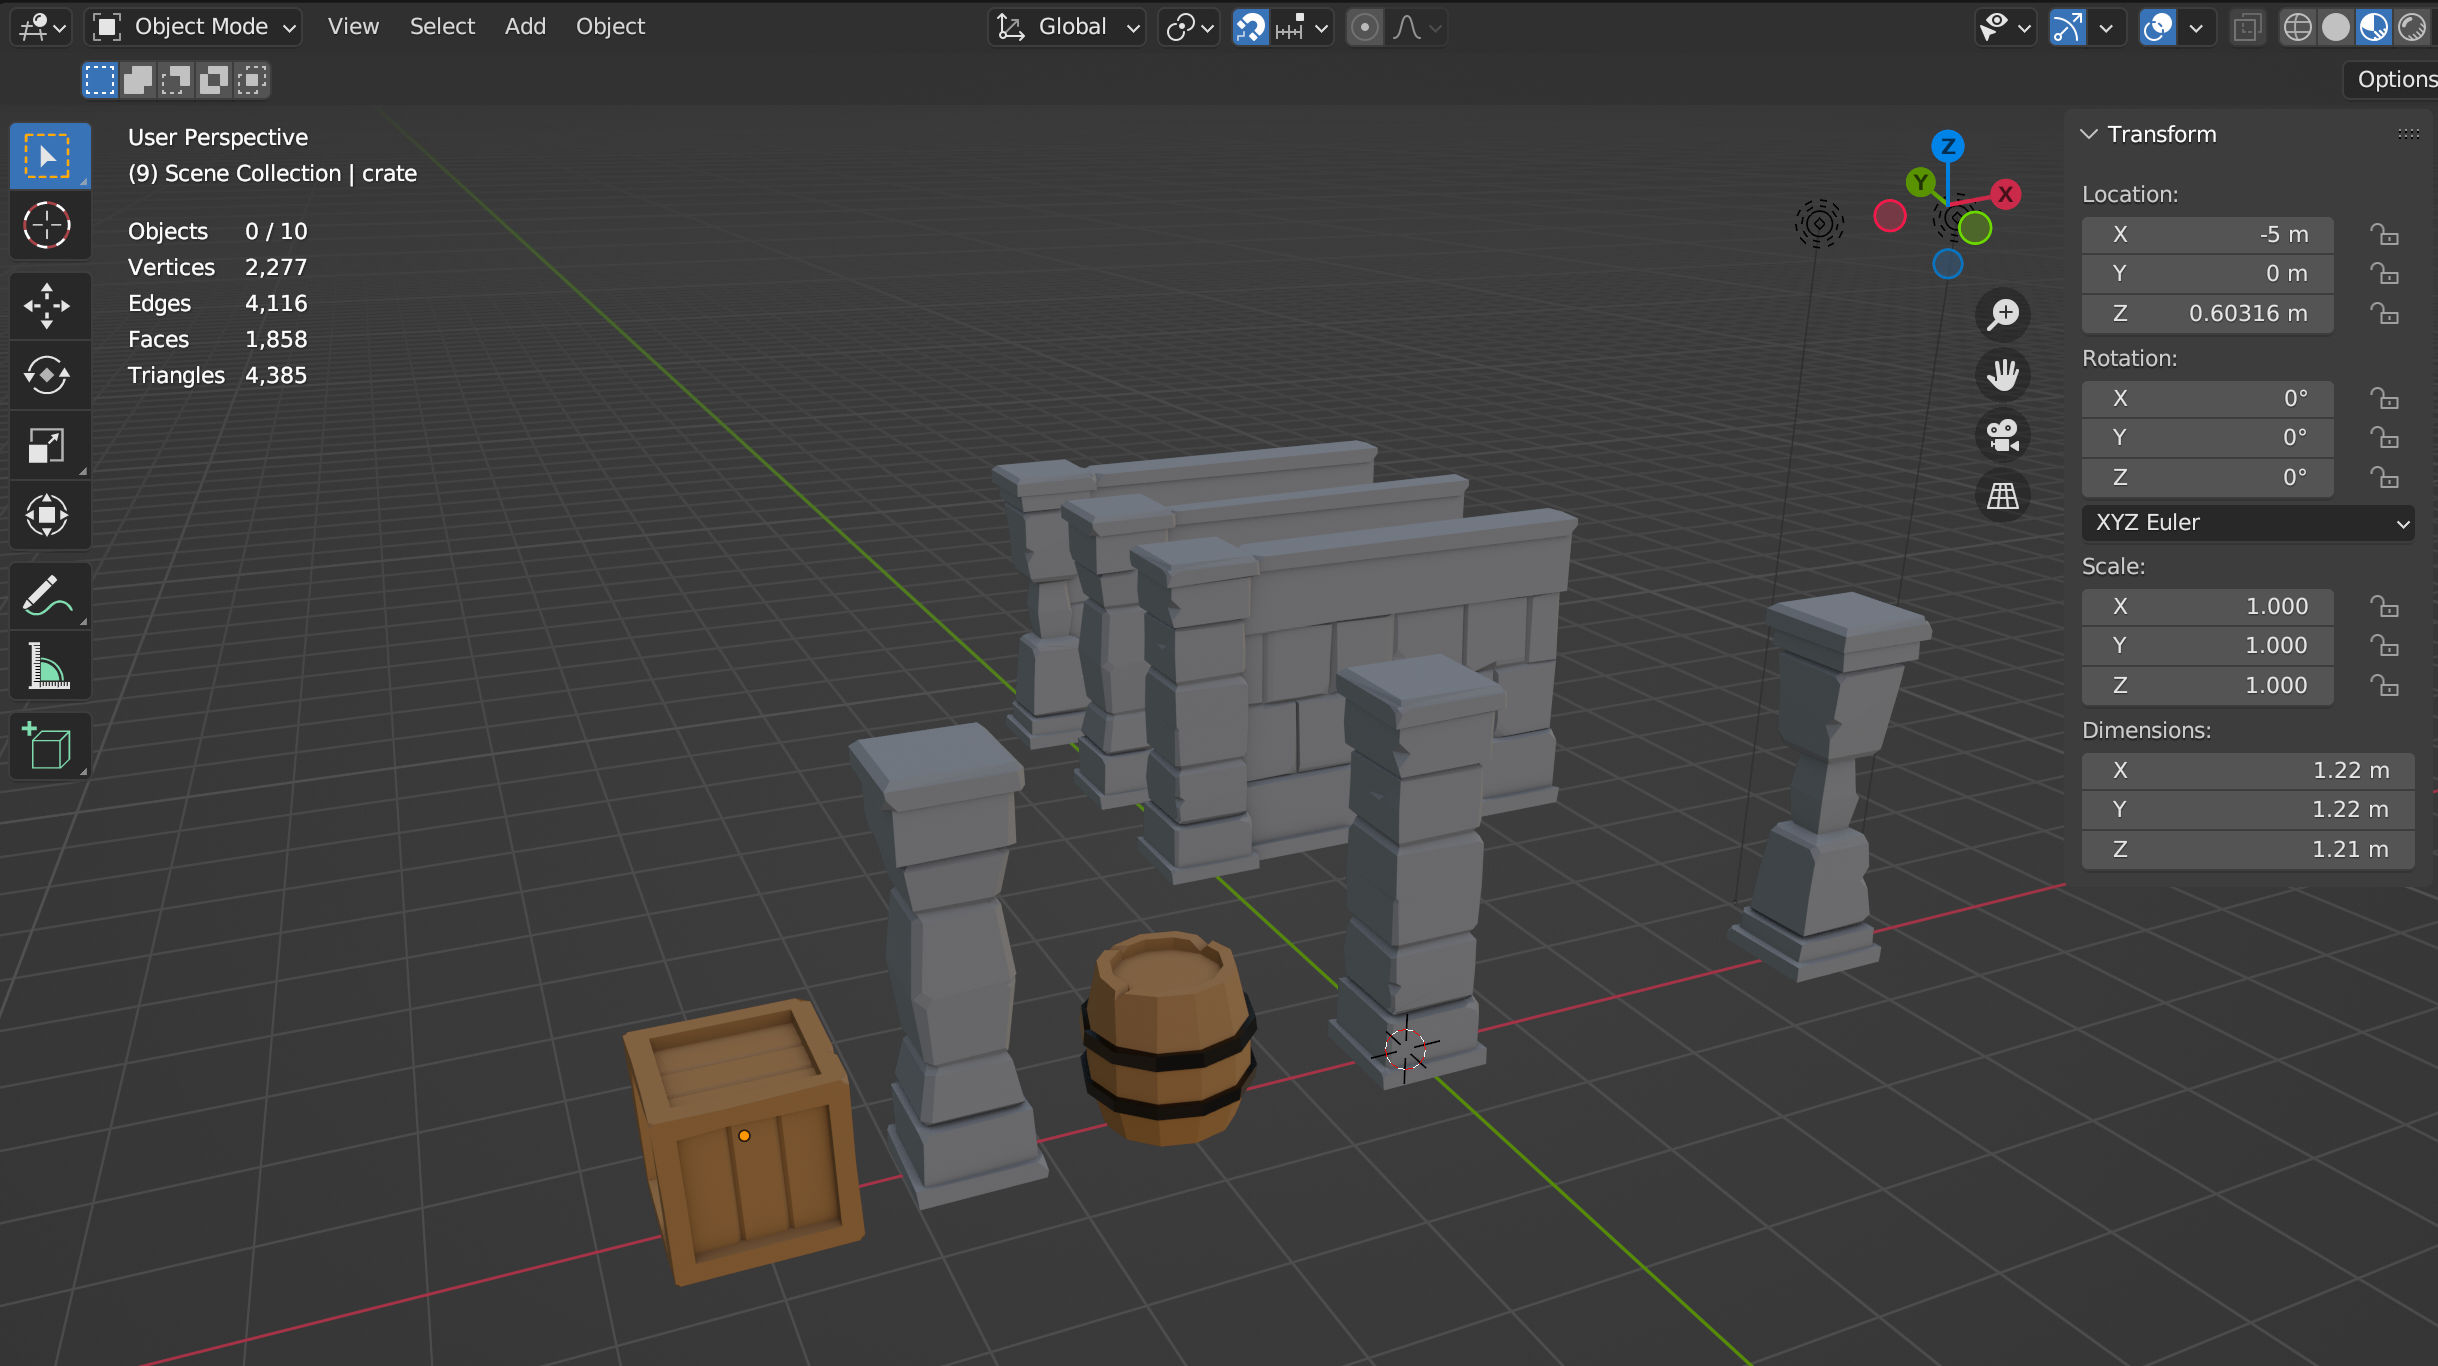 My little dungeon modular components lined up in the Blender viewport
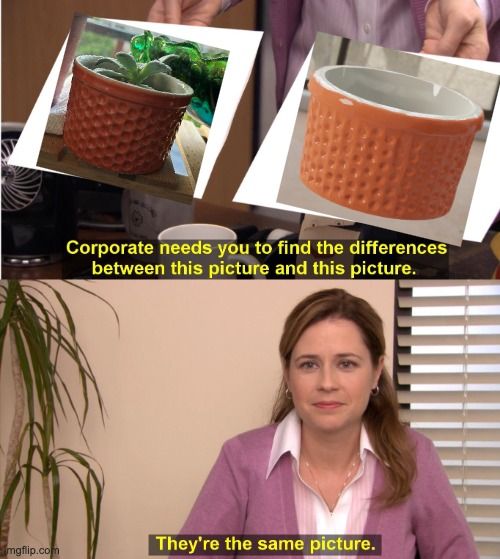
Succulent Pot Project
Buuuuut I haven't finished the dungeon project yet because I got sidetracked. I have shelves of potted plants sitting right above my computer monitor, and I wanted to model one of them. Unfortunately I only know how to model objects that very closely resemble geometric shapes, so I've only attempted the pot and not the actual succulent yet
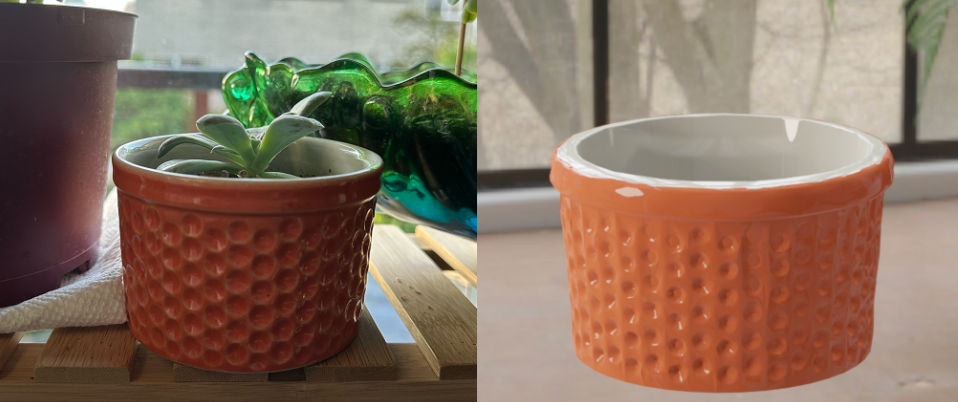 Physical object that inspired the 3D model
The pot posed enough of a challenge. I was able to recreate the basic shape pretty quickly by starting with a cylinder, removing the top face, and using a solidify modifier to give the sides some thickness. Next I got some practice with the sculpting tool and radial symmetry to create the columns of divots wrapping around the pot. I only had to make 2 columns of divots myself, and the sculpting brush symmetry settings copied the rest. These divots introduced a few problems though:
- Since I used the freeform sculpt tool, the mesh was no longer a regular geometric shape and its complexity skyrocketed to around 600,000 triangles. Meshes are made up of triangular faces stitched together and 600,000 is an insane amount for such a small model. My poor 2016 MacBook Pro was struggling. I used the decimate modifier to reduce complexity and get down to 30,000 faces
- When I made the divots, I wasn't careful about their depth and they ended up poking through to the pot's inner wall. I couldn't figure out how to smooth them down, so instead I added another cylindrical shell inside the pot that covered up those convex spots. That was pretty hacky and is definitely why my triangle count is so high. But oh well, this was just an experiment
Finally, I added materials to the inner and outer surfaces and tried to make them match the real pot as closely as possible. I played with the materials' specular property to get something vaguely ceramic looking, and added an environment map of a studio apartment to get some realistic reflections. I'm pretty proud of the final result!