
Background
This semester at ITP one of my favorite classes was "Exploring Concepts From Soft Robotics". We sure did explore several concepts, including
- Cable controls
- Flat patterned inflatables with mylar
- Mold making
- Silicone actuators
- Pneumatics
- Soft speakers
These are considered "soft" either because of the materials they use (mylar, silicone, fabric) or because they're controlled with soft things, i.e. the movement of air in pneumatic systems. Earlier in the class we used sphygmomanometers (blood pressure pumps) to inflate things by hand. I made a silicone actuator casting that was supposed to extend when inflated, but it didn't hold air well. It was also difficult to bring in large volumes of air with this small manual pump.
[My attempt at an inflatable silicone actuator. It's moving a bit when I squeeze air into it]
Programmable Air
This is where Programmable Air comes into play. Programmable Air is an open-source hardware kit for controlling pneumatic soft robots. It includes a circuit board with pumps and valves, allowing you to programmatically control how much air is pumped into or out of a system. Some example projects we saw include
- Inflating + deflating a balloon with code
- A confetti cannon inside of a cake, triggered when a knife cuts into it
- Delicately placing sprinkles on donuts with something like the pick-and-place machine I used for PCB assembly
 [The Programmable Air circuit board, with two air pumps and three valves to gate airflow]
Lots of fun projects to prototype with this small board! I was immediately drawn to using syringes as linear actuators. By connecting the Programmable Air's plastic tubing to the narrow opening on a syringe, switching between having the pumps blow/suck can move the syringe plunger up and down to create linear motion. I hot glued a marker to the butt of a syringe to hack together a little pneumatic tattoo gun!
[A pneumatically controlled syringe making a marker move up and down like a tattoo gun]
The code is incredibly simple, with convenient functions to control pumps.
// Extend the syringe plunger
switchOnPump(2);
blow();
delayWhileReadingPressure(200);
switchOffPumps();

// Retract the syringe plunger
switchOnPump(1);
suck();
delayWhileReadingPressure(400);
switchOffPumps();
For my final project, I wanted to take this further and see how many syringes I could control at once with Programmable Air. I'm starting to brainstorm for my thesis next semester, and may want to do something where I need to programmatically swap out colored pens. Pneumatics could be a potential solution for coordinating this movement. For the sake of packaging this exploration into a polished final project, I decided to design this pneumatic system into an absurdly large Sharpie marker that can deploy several normal sized Sharpies.
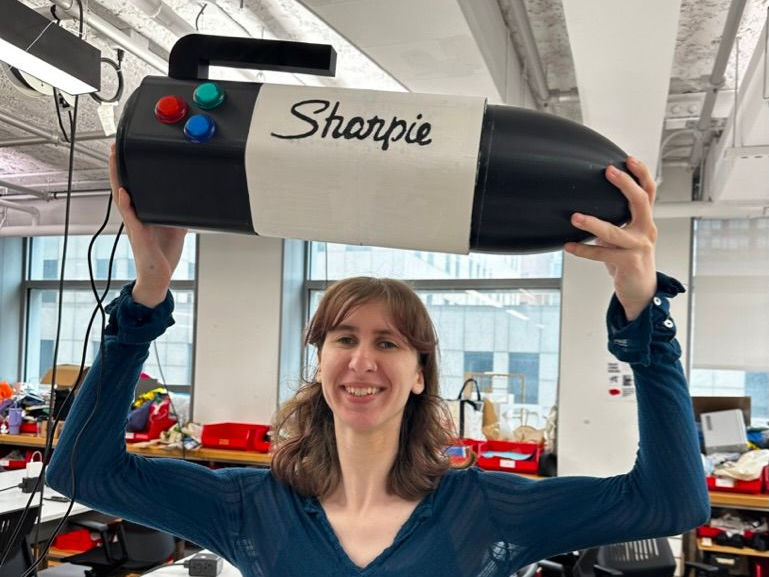
One month later, this is my son and his name is One Sharpie to Rule Them All. He's probably the size of a toddler.
Process
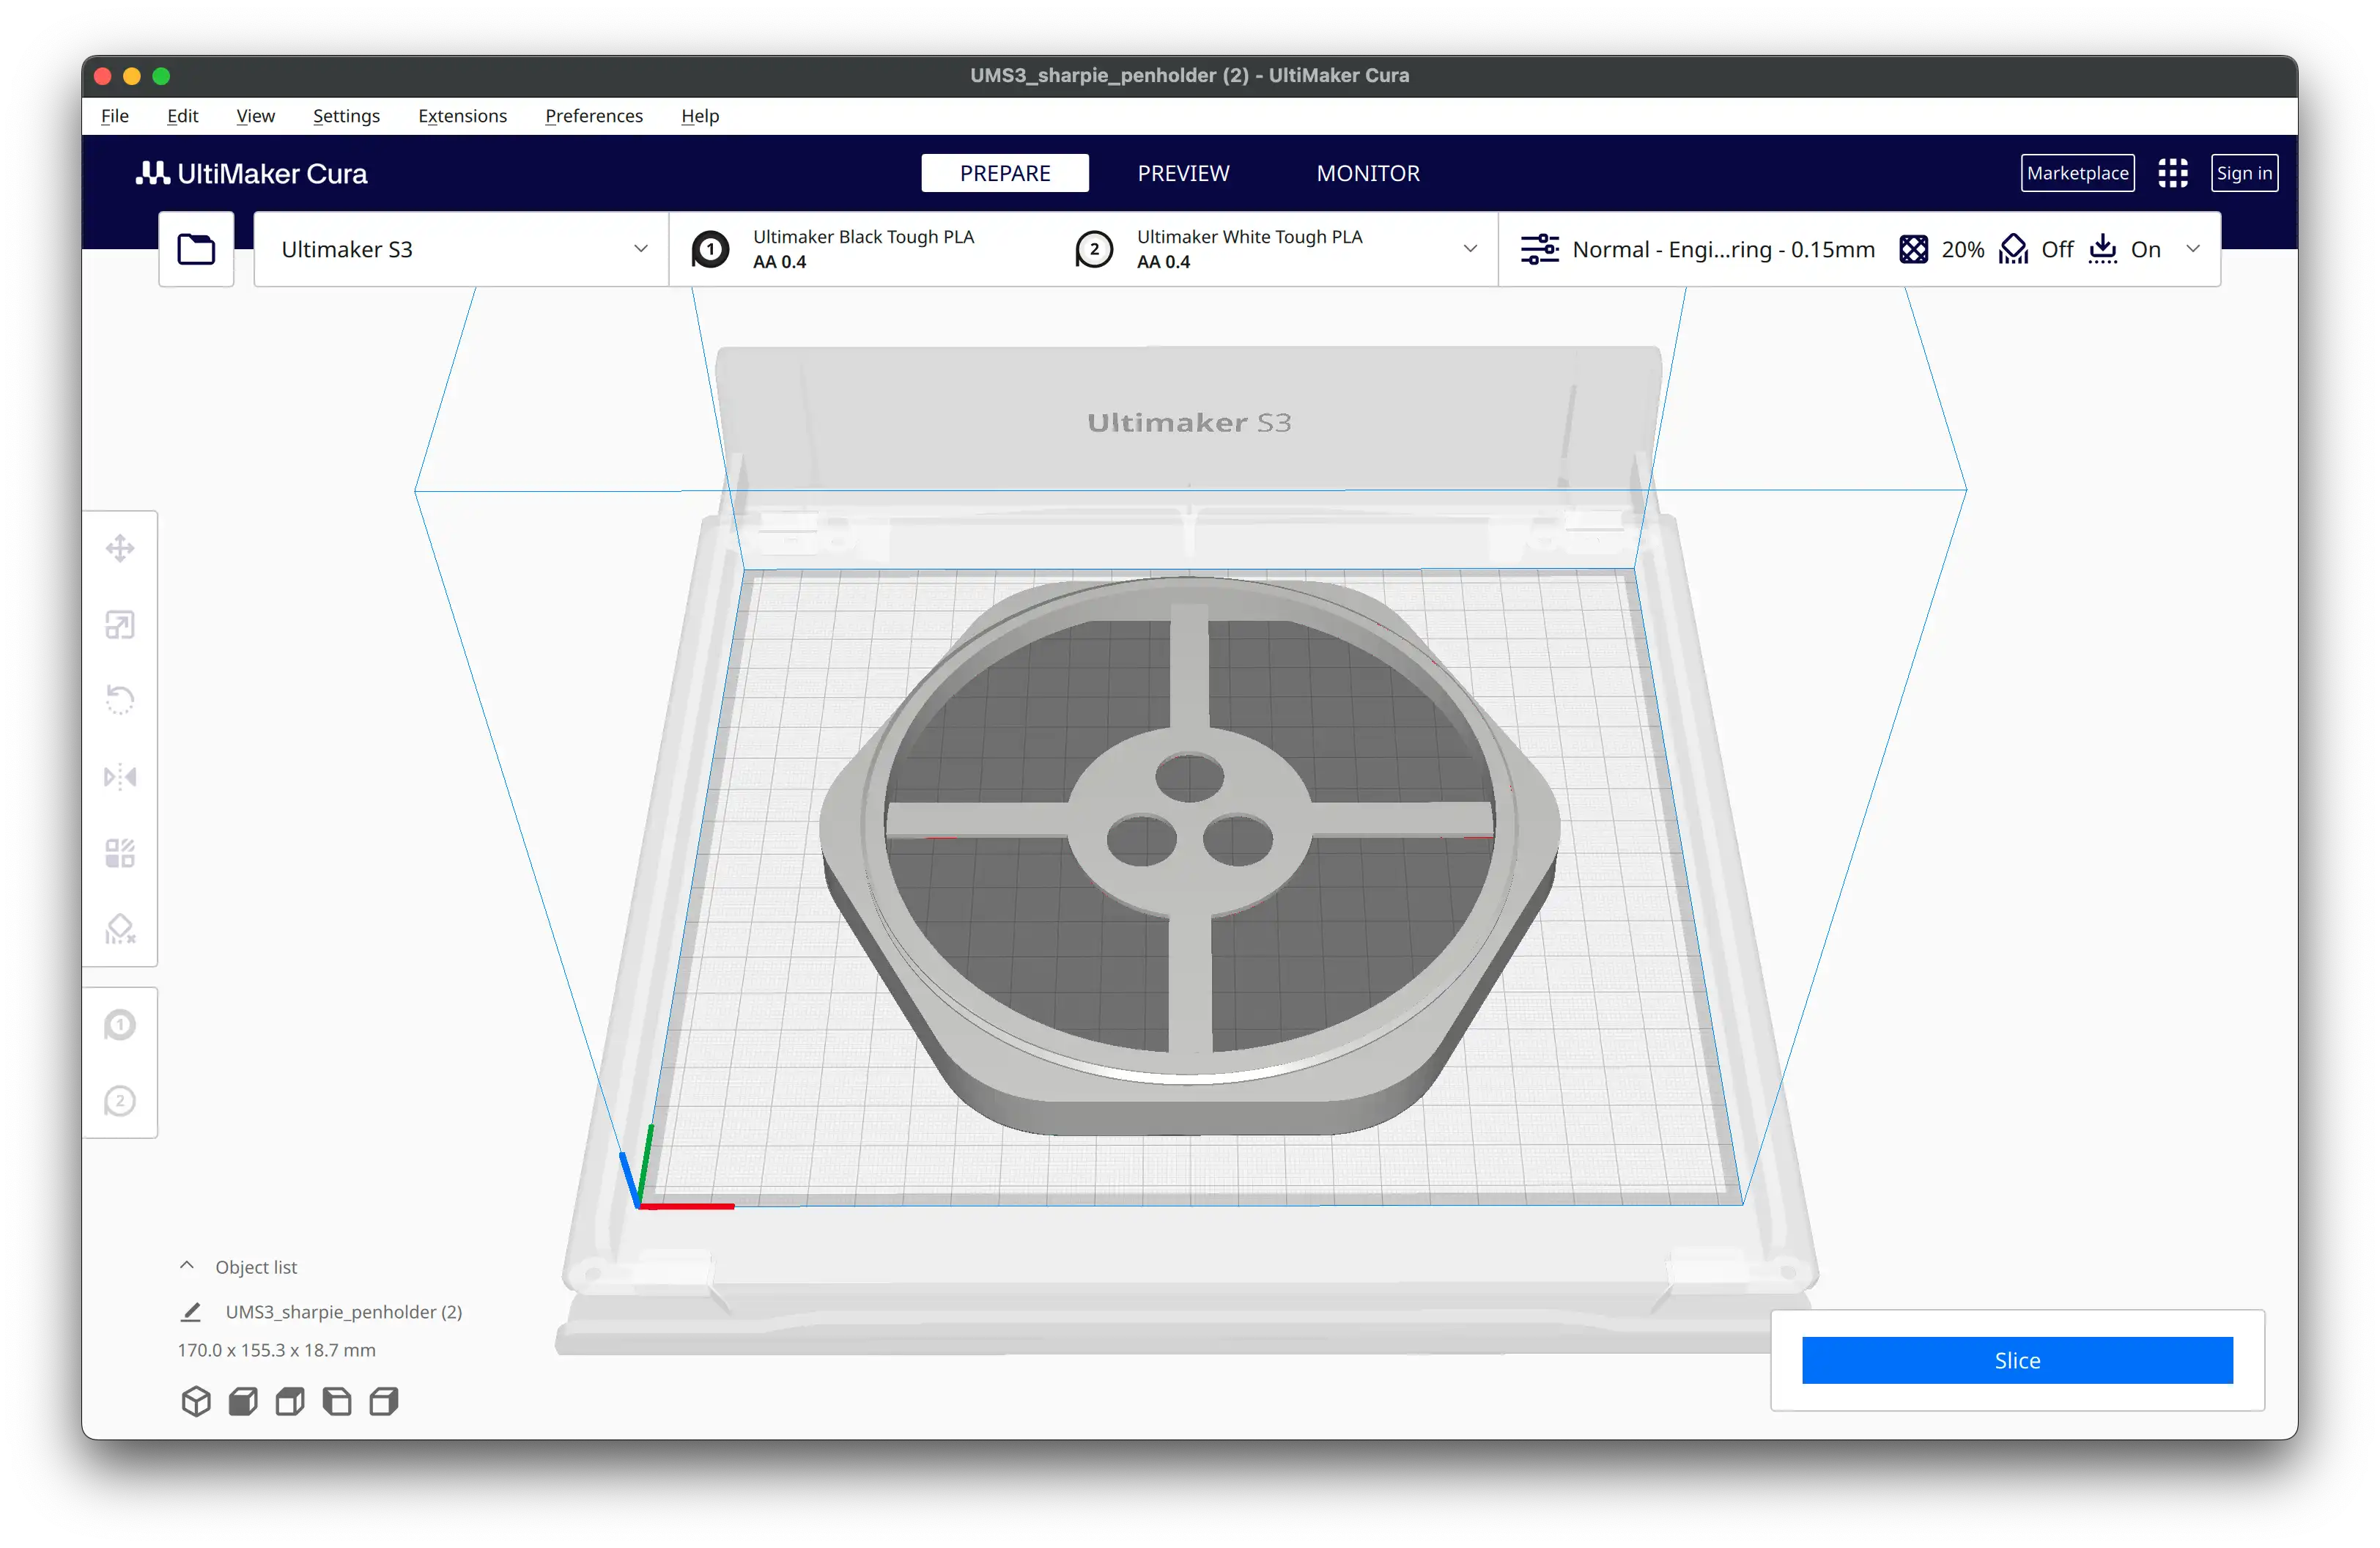
I collaborated with my friend Isabel Wu on this project. She handled the Sharpie body 3D modeling as part of her CAD class, while I focused on the pneumatics, electronics, and code. We 3D printed the following components at school
- Pen tip (black)
- Syringe holder with male screw threads (black)
- Female screw threads, x2 (black)
- Wall section, x4 (white)
- Wall with button holes and male screw threads (black)
- Pen cap (black)
- Pen cap leg (black)
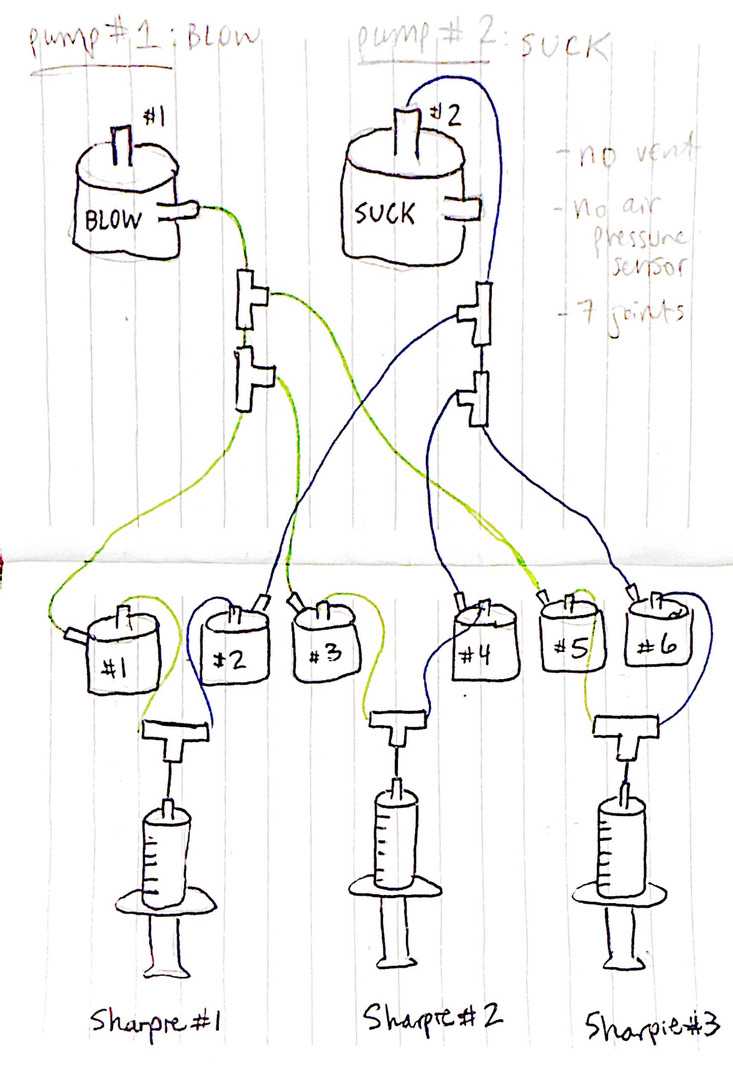
While we modeled and printed these components, I worked on maximizing the number of syringes controlled by a Programmable Air. After talking with my professor, Kari Love, I understood that each syringe must be connected to 2 valves
- Valve 1: allow air to be pumped in, to extend the syringe plunger
- Valve 2: allow air to be sucked out, to retract the syringe plunger
There are 3 available valves on a Programmable Air board. If I used two boards in tandem, that would provide 6 valves. 6 valves divided by 2 valves per syringe means in theory I could control a maximum of 3 syringes. While using the 2 pumps available on 1 Programmable Air board to suck and blow air into all 3 syringes. This is how I envisioned the air flow from pumps to valves to syringes, connected with plastic tubing and T-joints
The result is a mess of plastic tubing going between the 2 boards, with 3 syringes dangling off of the ends. Air from the 2 pumps on the left is directed into all 6 valves, and air from the pairs of valves are connected to syringes. Eventually I wrapped pieces of colored tape around parts of the tubing to help remember what to connect.
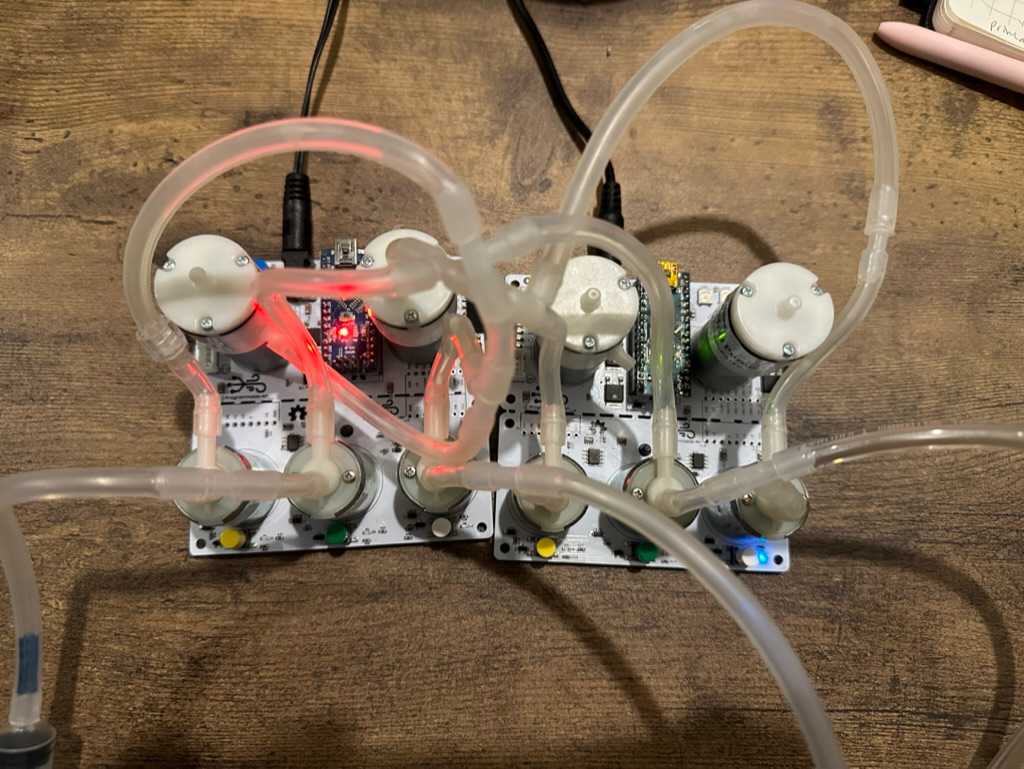
It worked! I was able to control 3 syringes at once using just the pumps on one board. The 2 boards are connected with a few wires so they can communicate with each other. I designated the board on the left as "primary" and the other as "secondary", and uploaded separate code to each. The primary board has code to operate the pumps, switching between sucking and blowing based on button presses. It also operates its own valves. The secondary board is much simpler, and only receives commands from the primary board that tell it which valves to open or close.
[My first test successfully proving that Programmable Air can control multiple syringes]
In this demo, all syringes are controlled together. They're either all extended or all retracted. My next step was to control each syringe individually with a button. For example, pressing a red button should extend a red Sharpie. In keeping with the fun and absurd theme, I bought some large, glowing arcade buttons from Adafruit to embed in the 3D printed Sharpie.
I wired these up as inputs to the primary Programmable Air and programmed the pumps and valves to respond to button presses. I also had to connect the buttons to a separate Arduino to control their built-in LEDs, to have them glow when their corresponding Sharpie color is extended. Here's all of the code. The result is a playful interface that's super fun to use!
[Pressing an arcade button toggles one syringe]
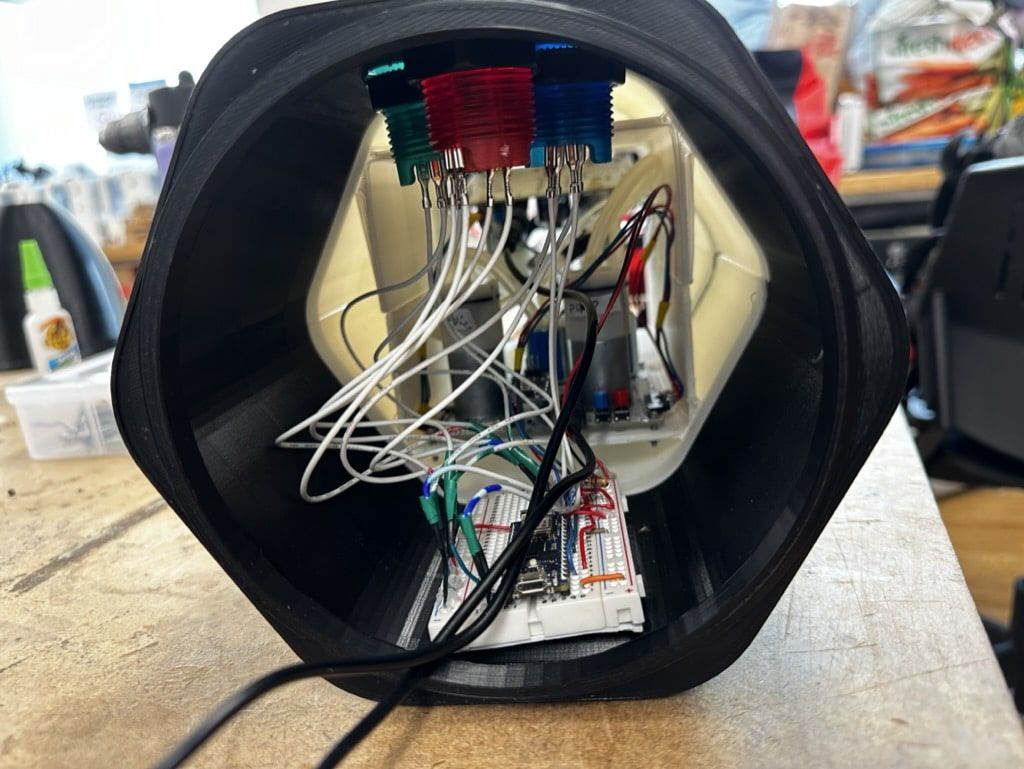
Assembly
After completing the pneumatic functionality, all that was left to do was shove everything into the 3D printed Sharpie body. Here's some photos of that process.
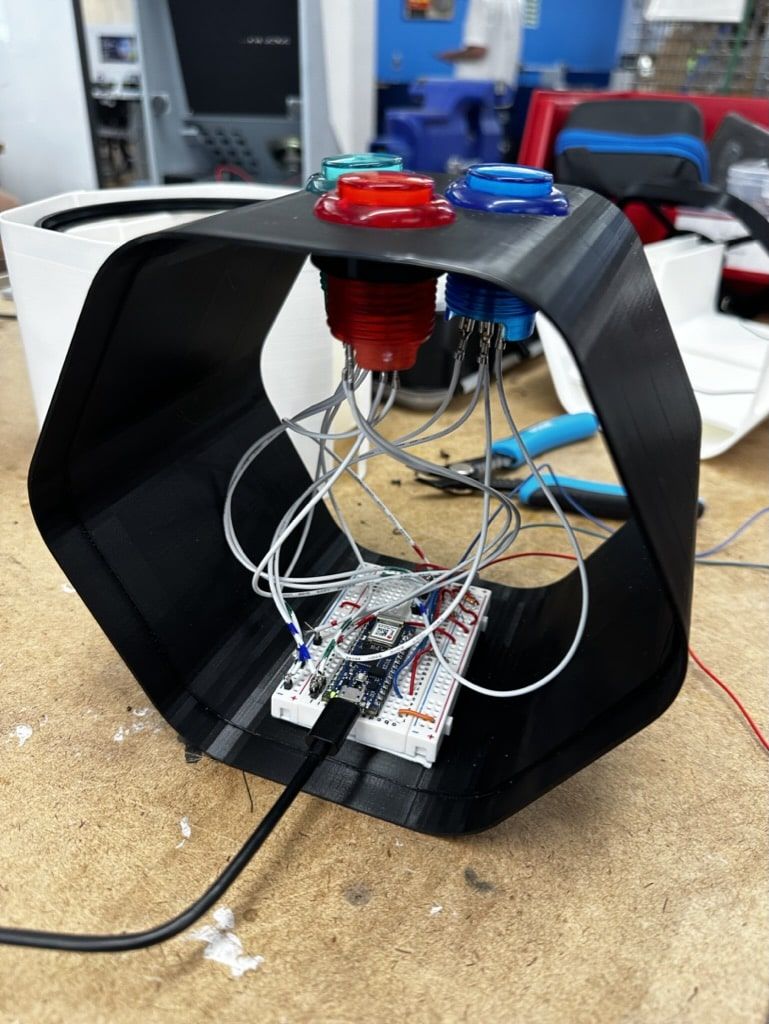 |
.jpeg?updatedAt=1714931241403) |
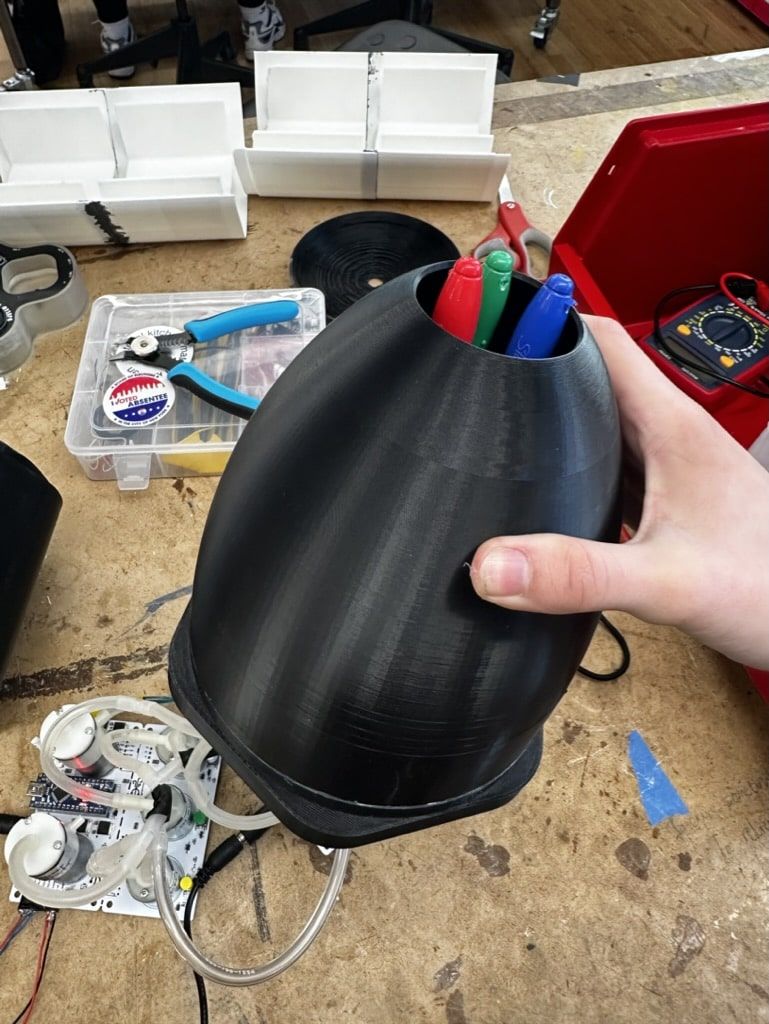 |
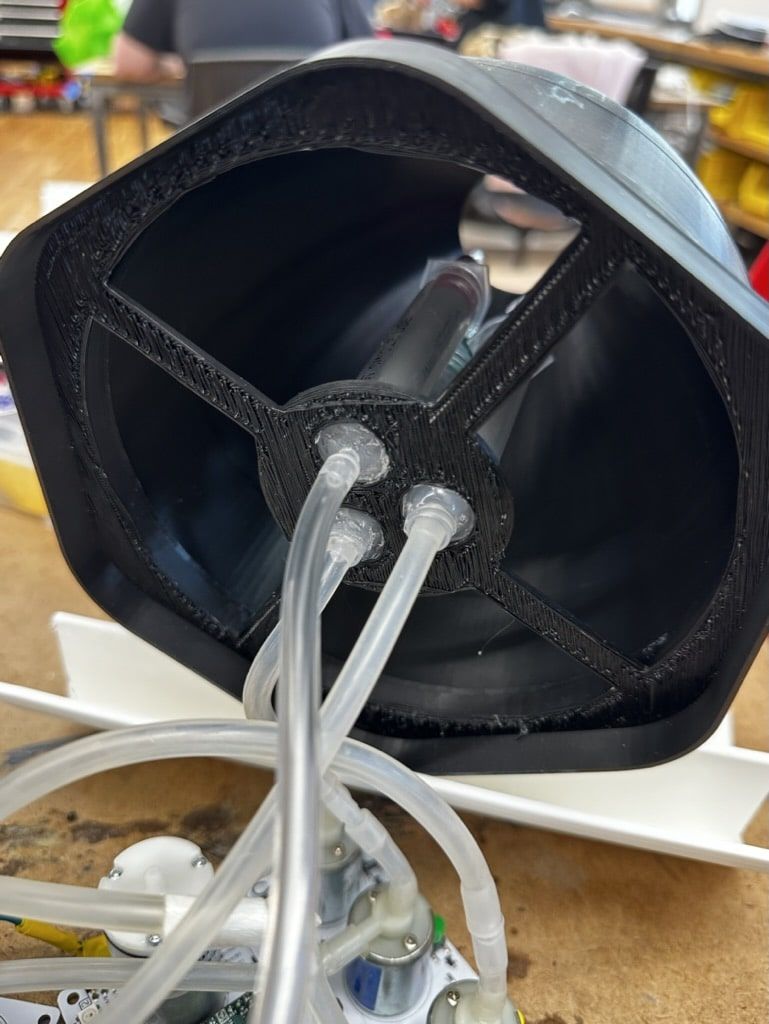 |
Final Product
Here's the final product, fully assembled and painted! I painted the Sharpie logo with a Sharpie paint pen, of course. The wires coming out of the end are the 12V power supplies for each Programmable Air. The arcade buttons successfully extend and retract the mini Sharpies!

[Pushing the buttons will control the mini Sharpies]
Overall this was a great way to grow my fabrication skills. This was the first time I had to work electronics into an enclosure, and it was challenging to organize the wires and plastic tubing inside of the 3D printed body while ensuring that nothing came unplugged. The feedback I received during my final presentation was positive, especially on the overall polish and industrial design!